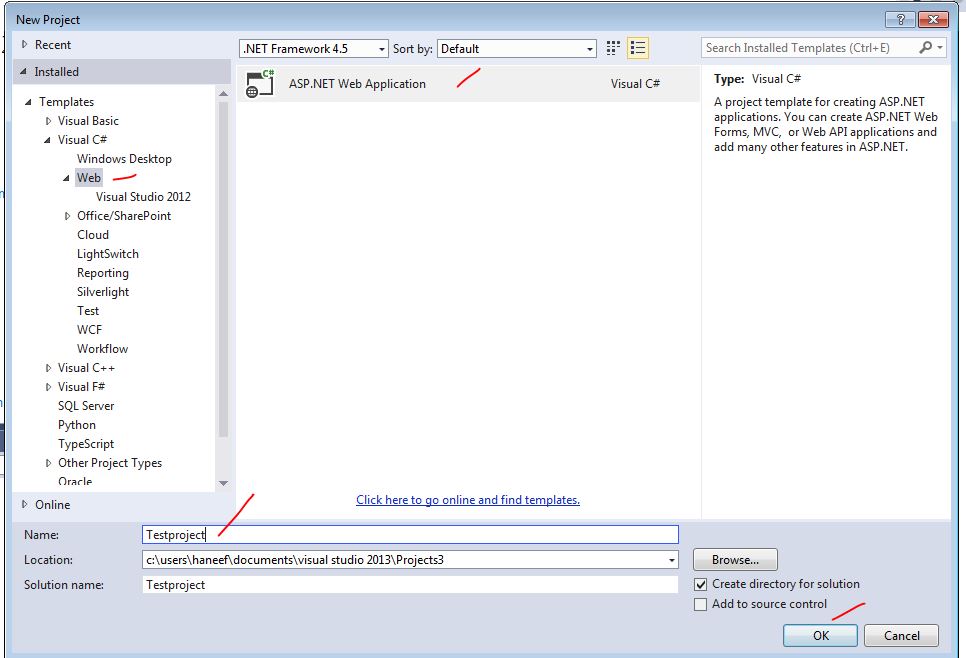
Task :
Connect to oracle DB using ODP.net and generate forms using Entity Frame Work without any coding.
Pre Requisites :
- Oracle Data Access Components (ODAC) with Oracle Developer Tools for Visual Studio http://www.oracle.com/technetwork/topics/dotnet/utilsoft-086879.html
- Microsoft Visual Studio 2013
- Oracle Database Instance Credentials.
- Entity Framework 6 Tools for Visual Studio 2012 & 2013 (http://www.microsoft.com/en-us/download/details.aspx?id=40762)
- Oracle Database with Required Tables Employee and Department ( Refer Part 1 of This tutorial)
Complete Video Tutorial
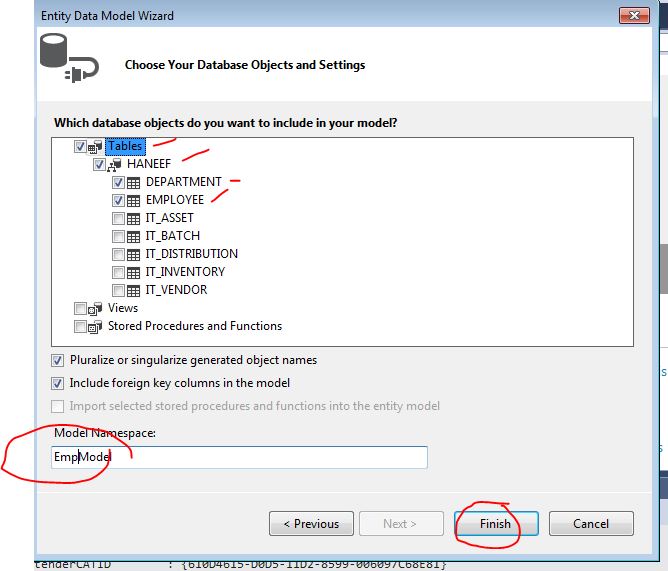
Right Click Models –> Add –> Select ADO.net entity data model
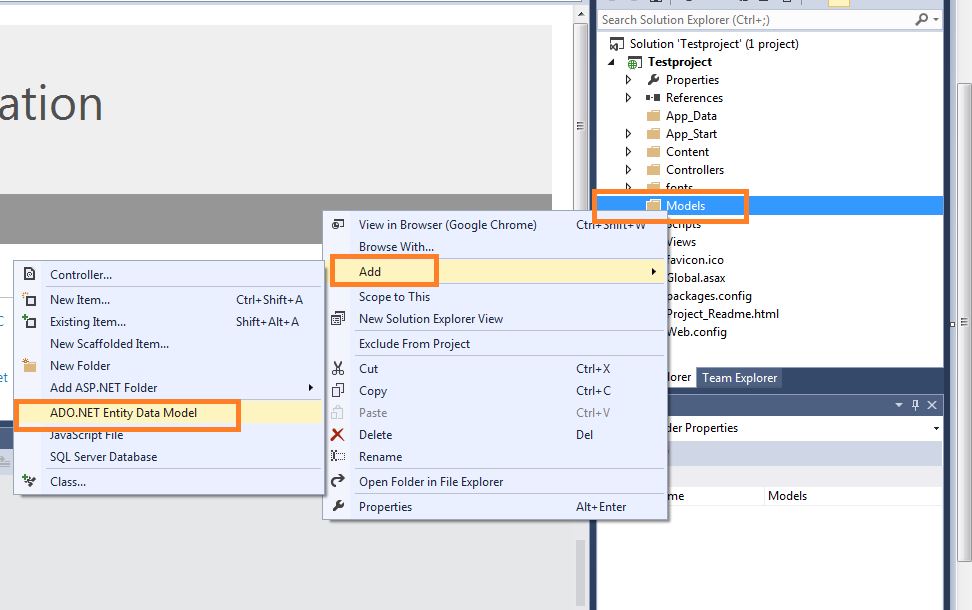
Enter name like “EmployeeModel” and press OK
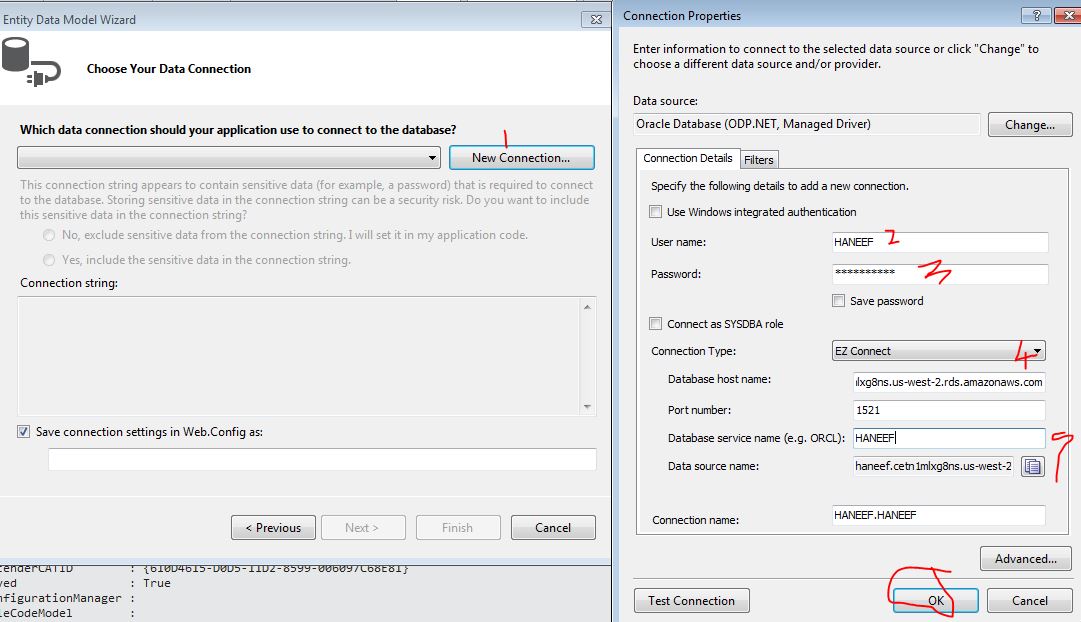
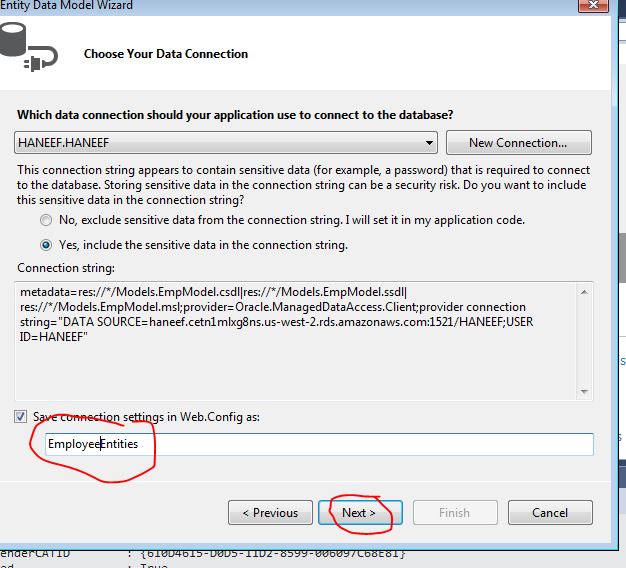
Click New Connection
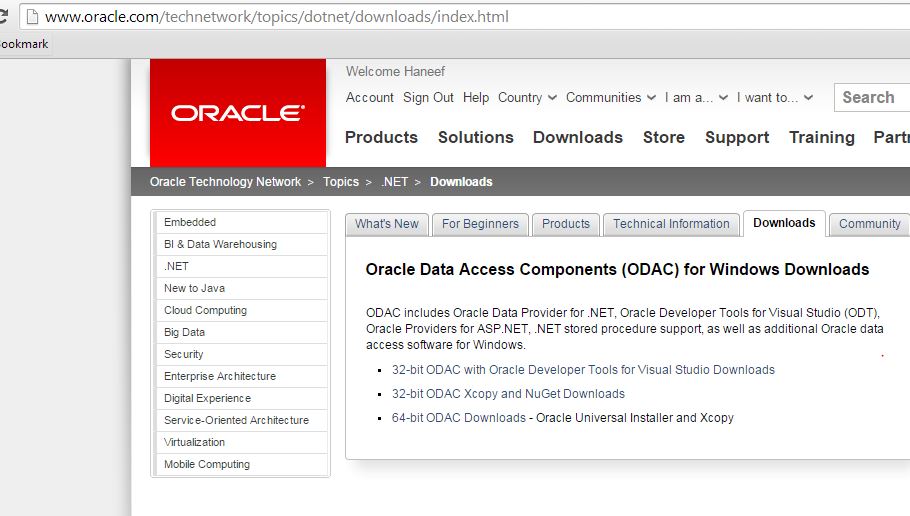
Please note if you cant find Oracle database ODP.net managed Driver , then please install ODP.net driver from following link before you proceed further.
http://www.oracle.com/technetwork/topics/dotnet/downloads/index.html
Now before you proceed further please build solution to make sure all is WELL upto this stage.
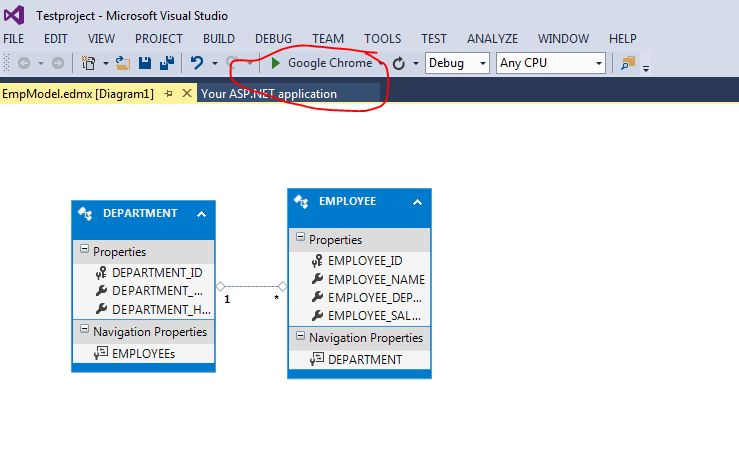

If you can see above image means then your configuration for ODP.net is fine .
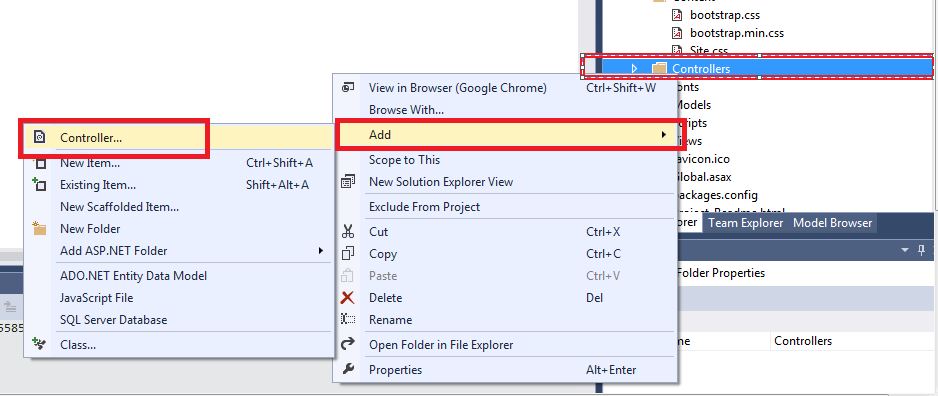
Now stop the instance using Shift+F5 and go ahead with adding Controllers
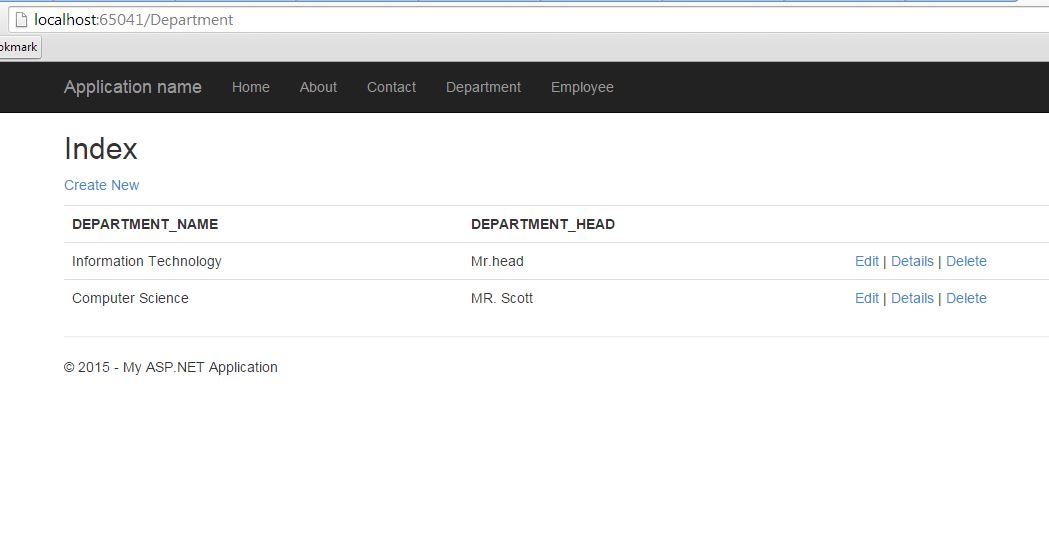
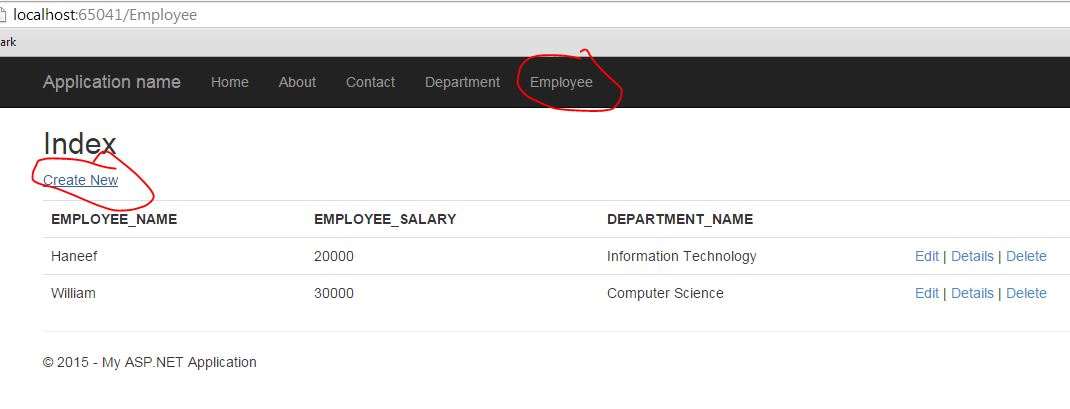
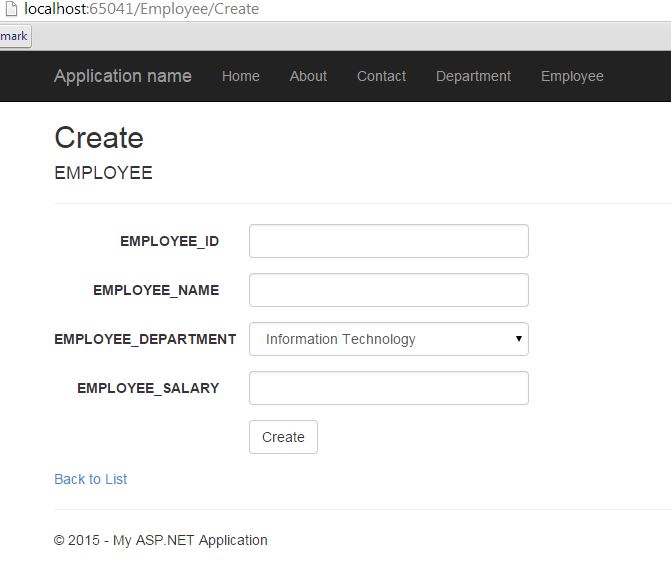
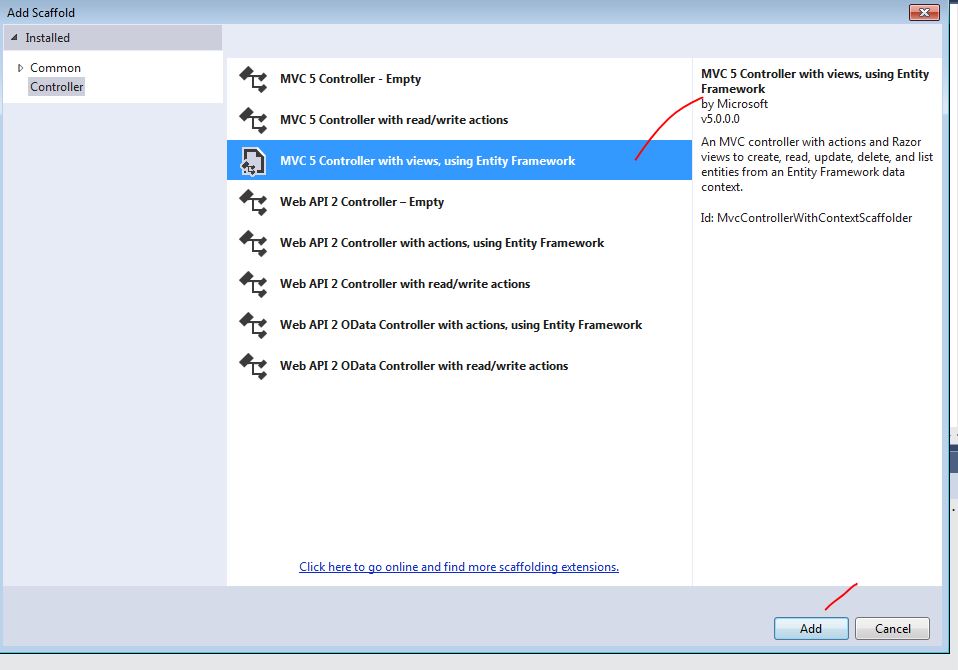
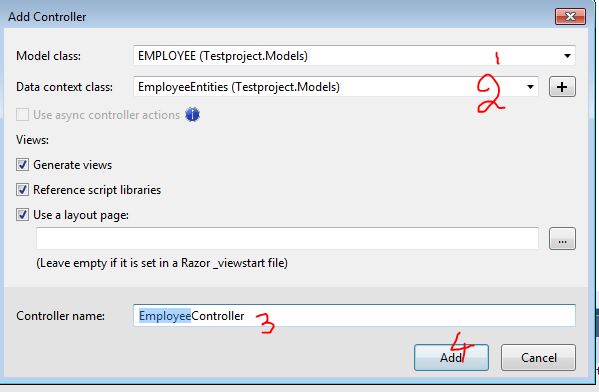
Now Add the two controllers (Employee and Departments) using Entity frame work
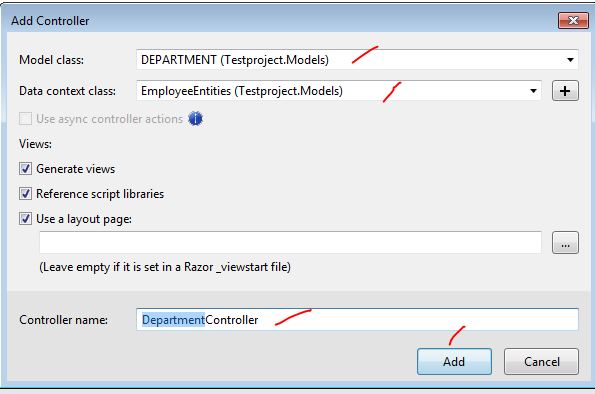
Follow the above same procedure and create another model for department.
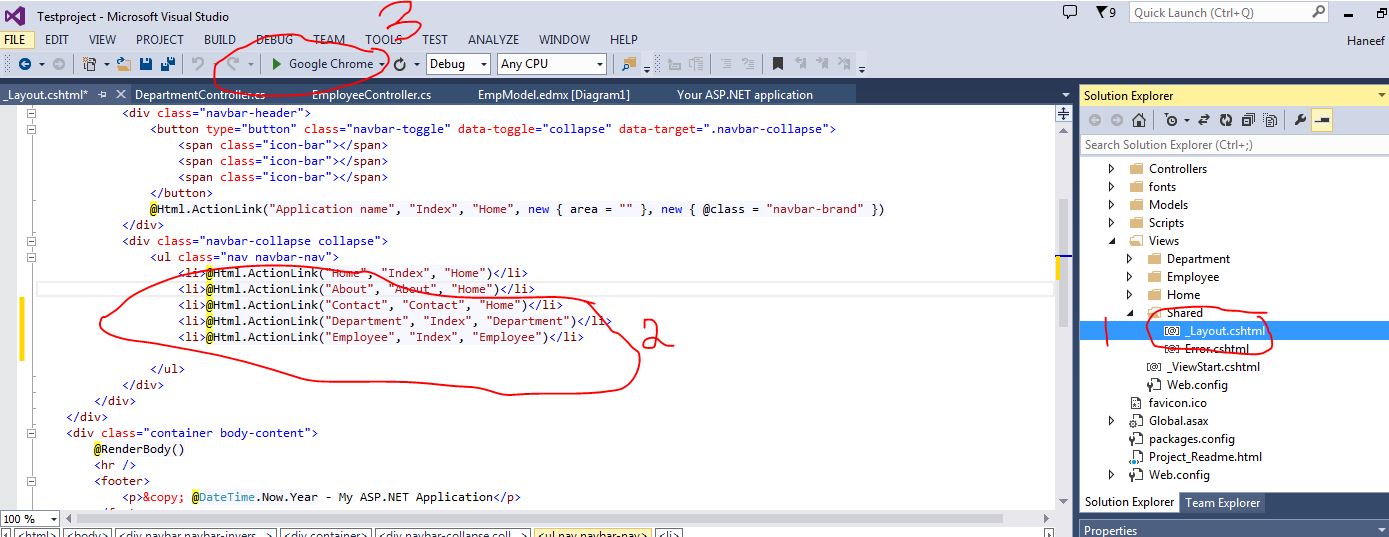
Now open Layout.cshtml from the view/shared folder and add the following two lines, which will create the links in the header for the Employee and Department controllers which we created now.
 <li>@Html.ActionLink("Department", "Index", "Department")</li>
 <li>@Html.ActionLink("Employee", "Index", "Employee")</li>
Now Click Run — by pressing F5 to see the application in action.