In our previous post we have gone through how to create a free blog in the blogger.com In this tutorial we will explore step by step adding a custom domain to the blogger.com blog. In our case it is digixonline.blogspot.com and we will be mapping it to fwmails.com
Pre Requisites:
1. Before we proceed make sure you already registered your own domain. If not please register one domain at www.digixonline.com
2. Please make sure you already create a blog in blogger.com . If not please go through my previous post
Steps for Mapping Custom Domain
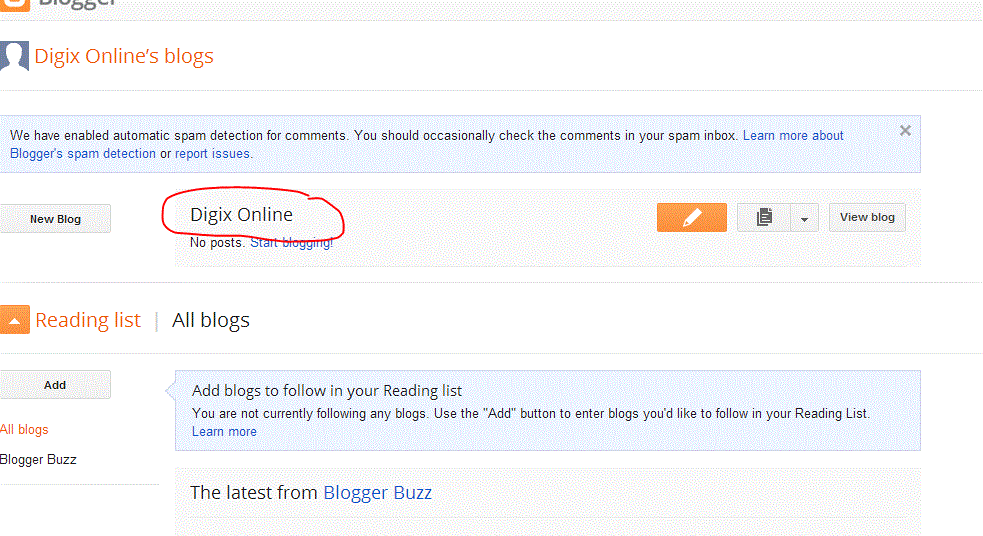
1. Login to blogger.com
2. Click on the Blog for which you would like to add custom domain
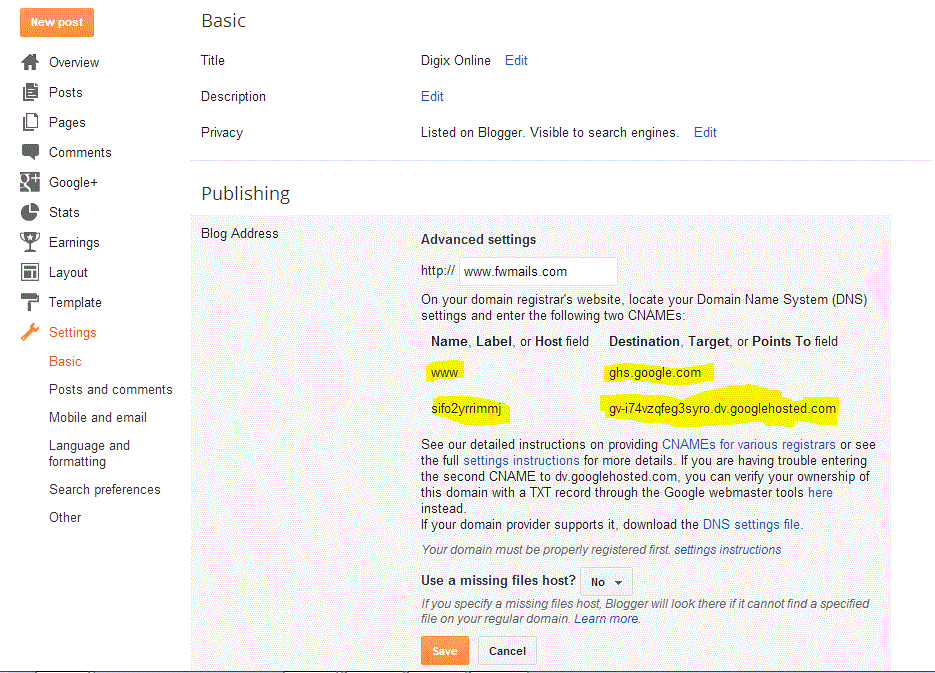
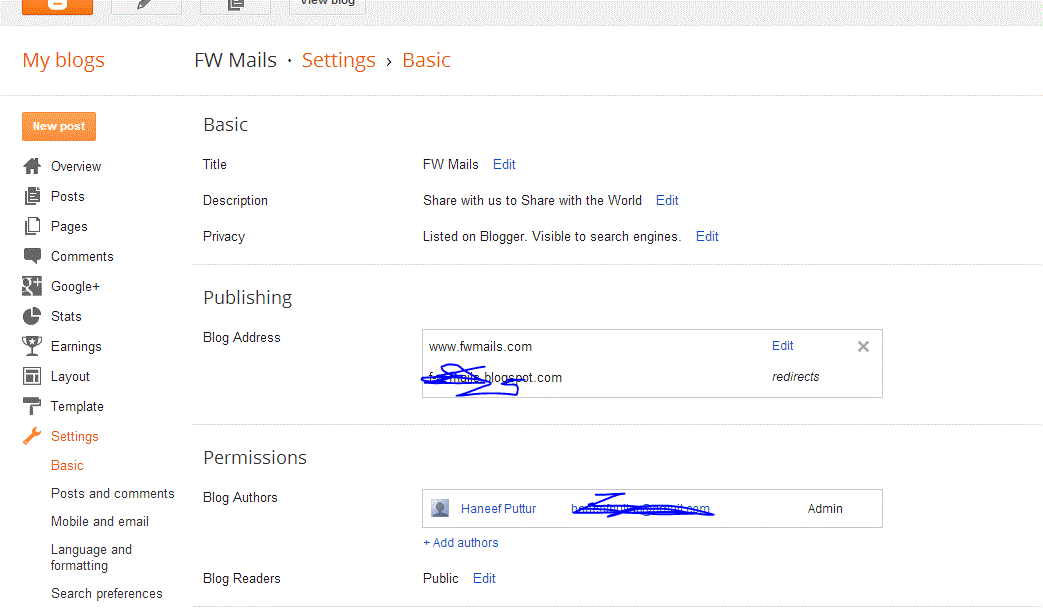
2. Click on Settings –> Add Custom Domain
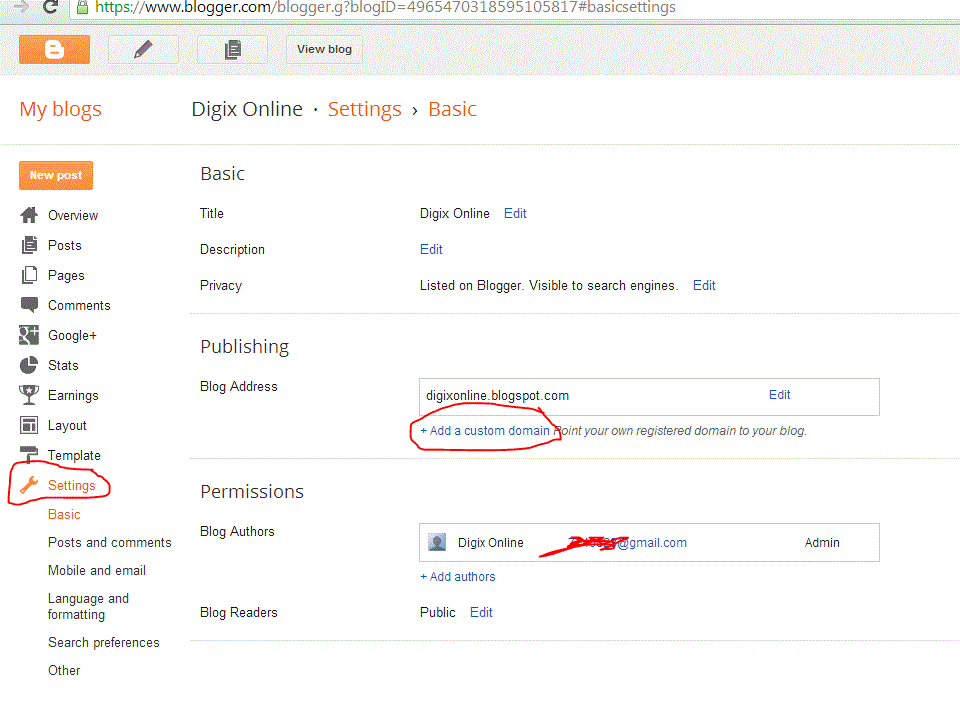 3. Now add www.fwmails.com and click save Once. Now system will show some settings as shown below , however do not click Save for second time as it will fail to save.
4. Now please note down the Yellow highlighted text , which will be used in the digixonline.com domain account to update the domain settings.
www ghs.google.com
sifgfgfvrimmj gv-i74vbczqfg3syro.dv.googlehosted.com
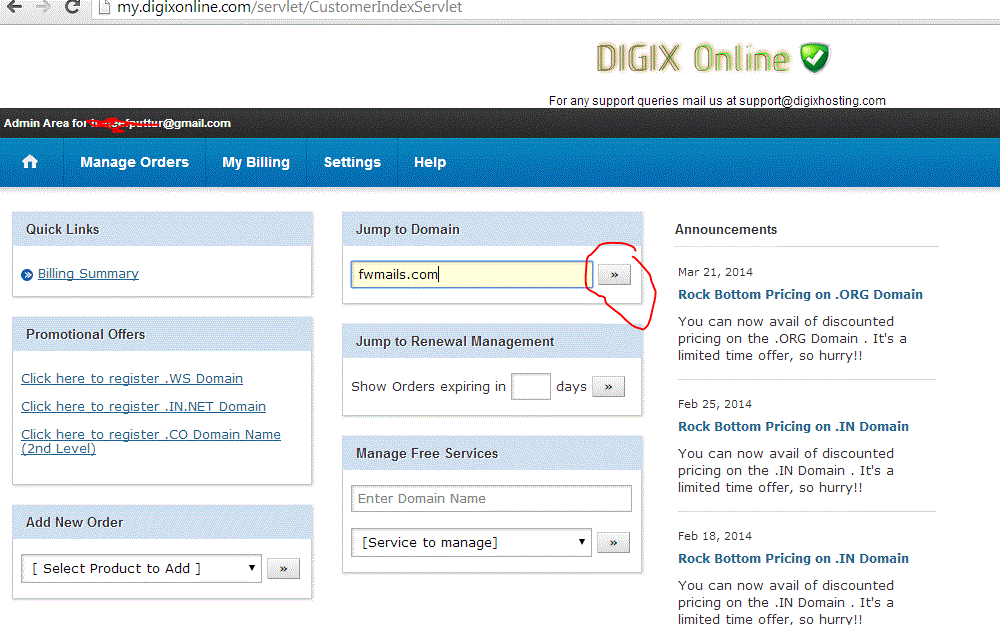
5. Now please login to the domain control panel of digixonline.com with your username and password.
6.Now search for the domain in the search box as follows.
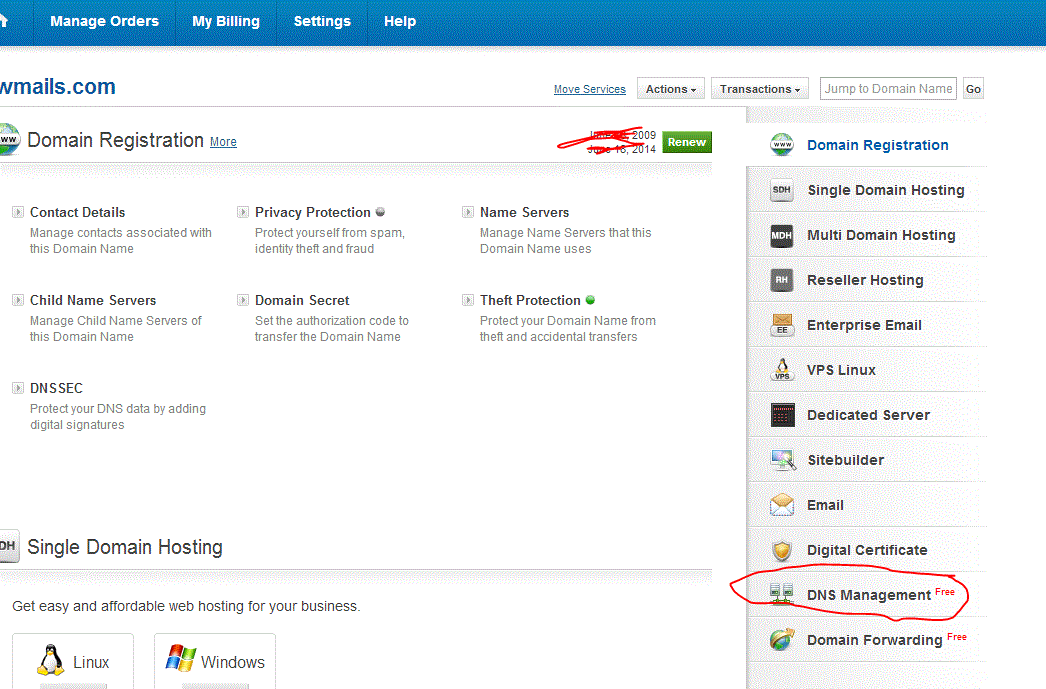
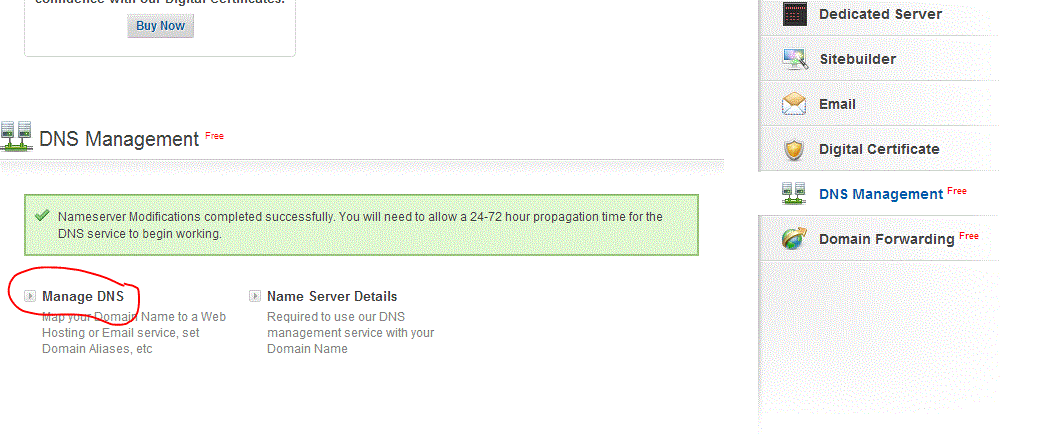
7. Now Click DNS Management –> Manage DNS
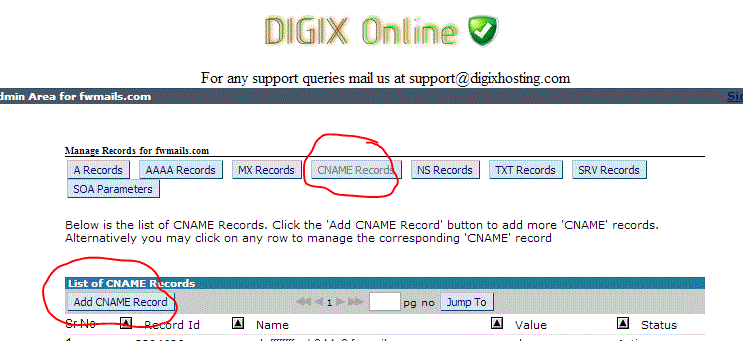
8. Now Click CNAME and Click Add CNAME records
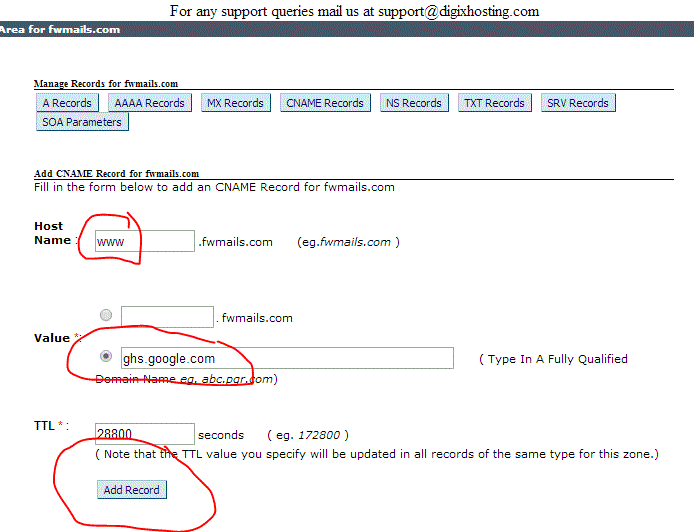
First add the www record as shown which we copied from the previous steps.
9. Now add the second CNAME record as shown below
Click ADD CNAME
Then add following and Click Add Record.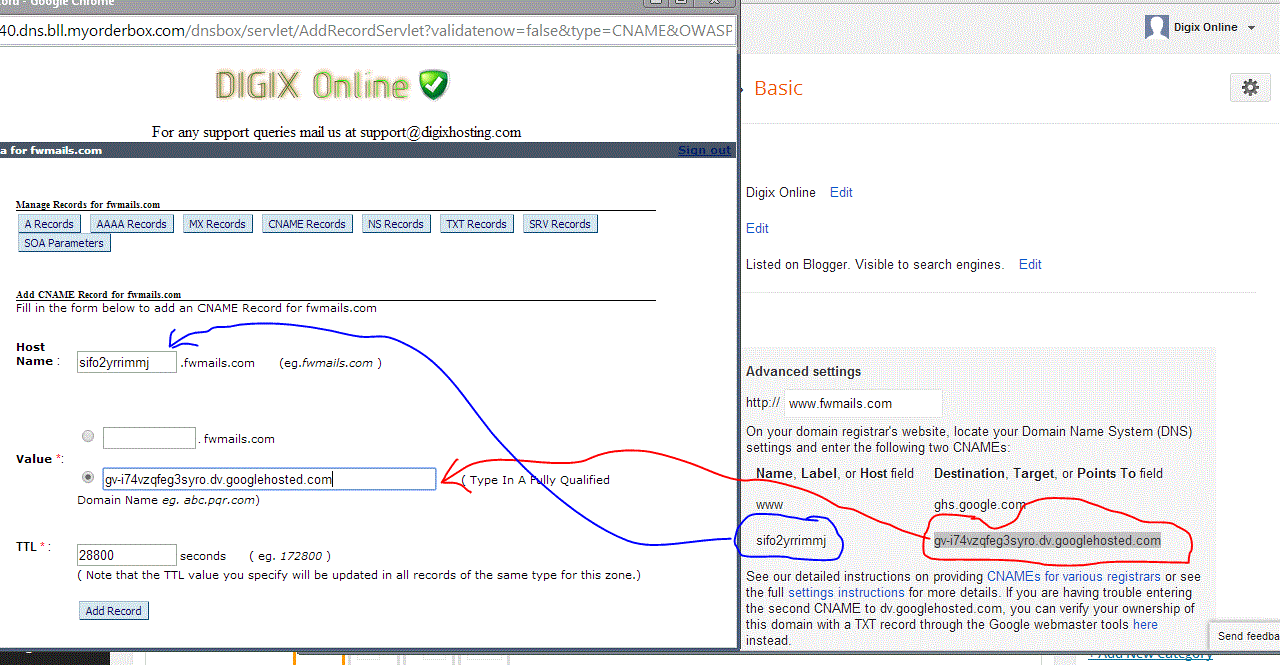
10. Please wait for at least one hour before proceed to the next step for DNS propogation or ELSE YOU MAY RECIEVE ERROR WHILE SAVING in your blogger account.
After one hour, please login again to blogger–> Go to Settings –> Add Custom Domain –> Enter your custom domain and Click Save
Now your blogger blog digixonline.blogspot.com will start working from our custom domain www.fwmails.com
Congrats .. Now your blog live. Hope this helps all those who wish to make your blog in own name. If any questions please feel free to to ask in comments box below.
