One of the common issue face is adding rich text editor with image upload option in bootstrap project which uses MVC , C# ASP.net
I have spent a lot of time to customize TinyMCE editor, however I could not succeed completely.
I have found summernote a very lite weight editor for Bootstrap.
Step 1 : Create a default MVC ASP.NET project in Visual Studio 2013
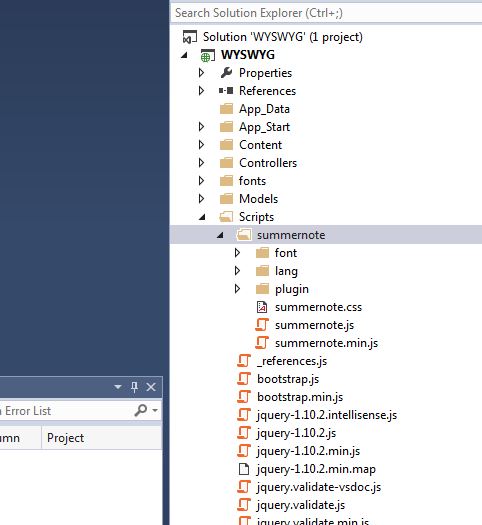
Step 2 : Download summernote from http://summernote.org/
Step 3 : Copy the downloaded folder content to Scripts folder as shown
Step 4 :
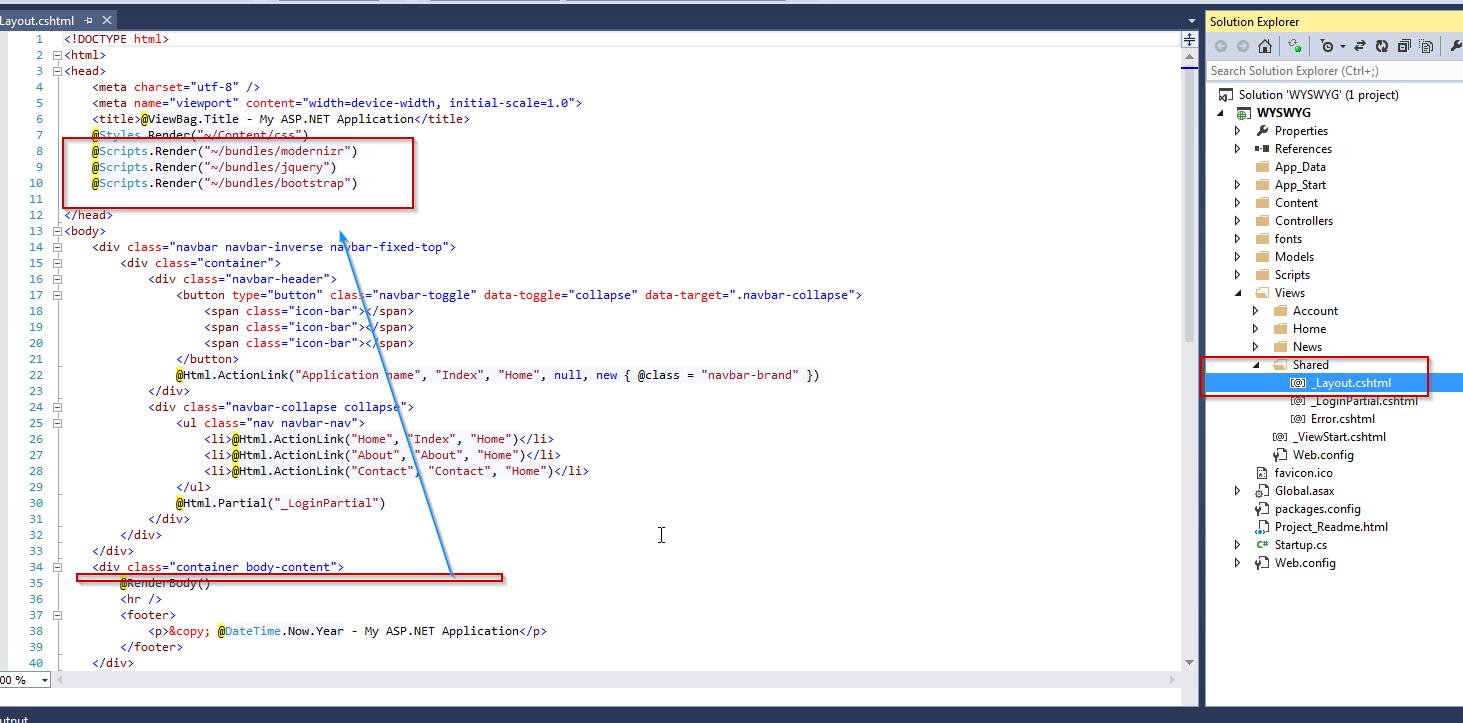
Edit View –> Shared -> Layout.cshtml
Move jquery bundle to top of the page
Step 5:
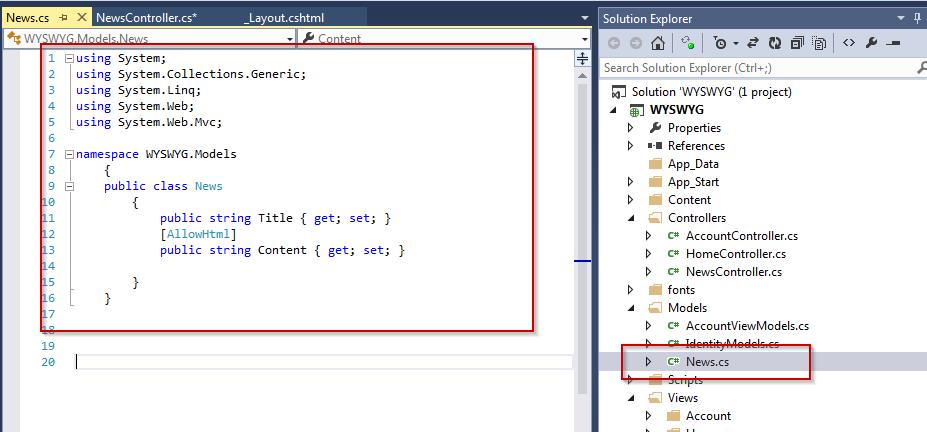
Create a Model , name as News.cs
using System.Web.Mvc;

namespace WYSWYG.Models
 {
 public class News
 {
 public string Title { get; set; }
 [AllowHtml]
 public string Content { get; set; }

 }
 }
Step6
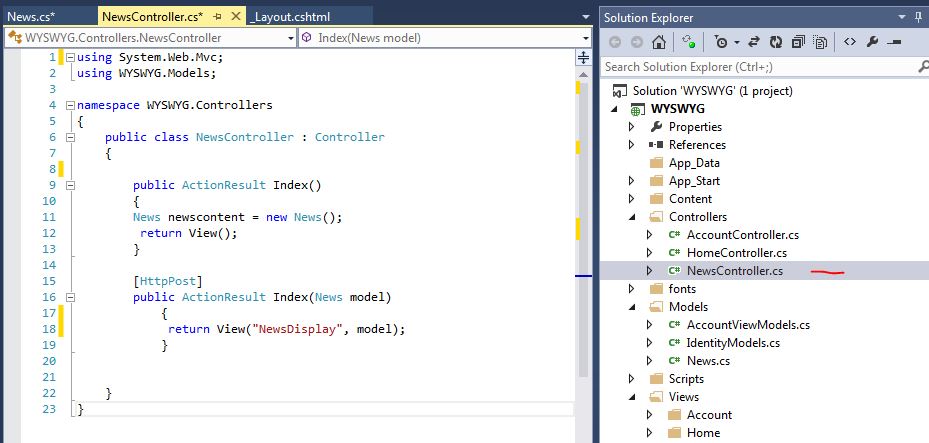
Create a Controller NewsController.cs
using System.Web.Mvc;
using WYSWYG.Models;

namespace WYSWYG.Controllers
{
    public class NewsController : Controller
    {

        public ActionResult Index()
        {
        News newscontent = new News();
         return View();
        }

        [HttpPost]
        public ActionResult Index(News model)
            {
             return View("NewsDisplay", model);
            }


	}
}
Step 7 :
Create a View and Name it as Index.cshtml under The View Folder News
@model WYSWYG.Models.News
@{
ViewBag.Title = “News Editing”;
}
<link href=”~/Scripts/summernote/summernote.css” rel=”stylesheet” />
<script src=”~/Scripts/summernote/summernote.js”></script>
<h2>Index</h2>
<div class=”panel panel-primary”>
<div class=”panel-heading panel-head”>Add News</div>
<div class=”panel-body”>
@using (Html.BeginForm())
{
<div class=”form-horizontal”>
<div class=”form-group”>
@Html.LabelFor(model => model.Title, new { @class = “col-lg-2 control-label” })
<div class=”col-lg-9″>
@Html.TextBoxFor(model => model.Title, new { @class = “form-control” })
</div>
</div>
<div class=”form-group”>
@Html.LabelFor(model => model.Content, new { @class = “col-lg-2 control-label” })
<div class=”col-lg-9″>
@Html.TextAreaFor(model => model.Content, new { @class = “form-control”, @row = 5 })
</div>
</div>
<div class=”form-group”>
<div class=”col-lg-9″></div>
<div class=”col-lg-3″>
<button class=”btn btn-success” id=”btnSubmit” type=”submit”>
Submit
</button>
</div>
</div>
</div>
}
</div>
</div>
<script>
//$(document).ready(function () {
// $(‘#Content’).summernote();
//});
$(‘#Content’).summernote({
height: 300, // set editor height
minHeight: null, // set minimum height of editor
maxHeight: null, // set maximum height of editor
focus: true // set focus to editable area after initializing summernote
});
</script>
Step 8 : Create a view Called NewsDisplay.cshtml and add following content
@model WYSWYG.Models.News
@{
ViewBag.Title = "News Display";
}

<h2>News Display - View The Submitted Content</h2>

<div class="panel panel-primary">
<div class="panel-heading panel-head">Add News</div>
<div class="panel-body">

<div class="form-horizontal">
<div class="form-group">
@Html.LabelFor(model => model.Title, new { @class = "col-lg-2 control-label" })
<div class="col-lg-9">
@Html.DisplayFor(model => model.Title, new { @class = "form-control" })
</div>
</div>
<div class="form-group">
@Html.LabelFor(model => model.Content, new { @class = "col-lg-2 control-label" })
<div class="col-lg-9">
@Html.Raw(Model.Content)

</div>
</div>

</div>

</div>
</div>

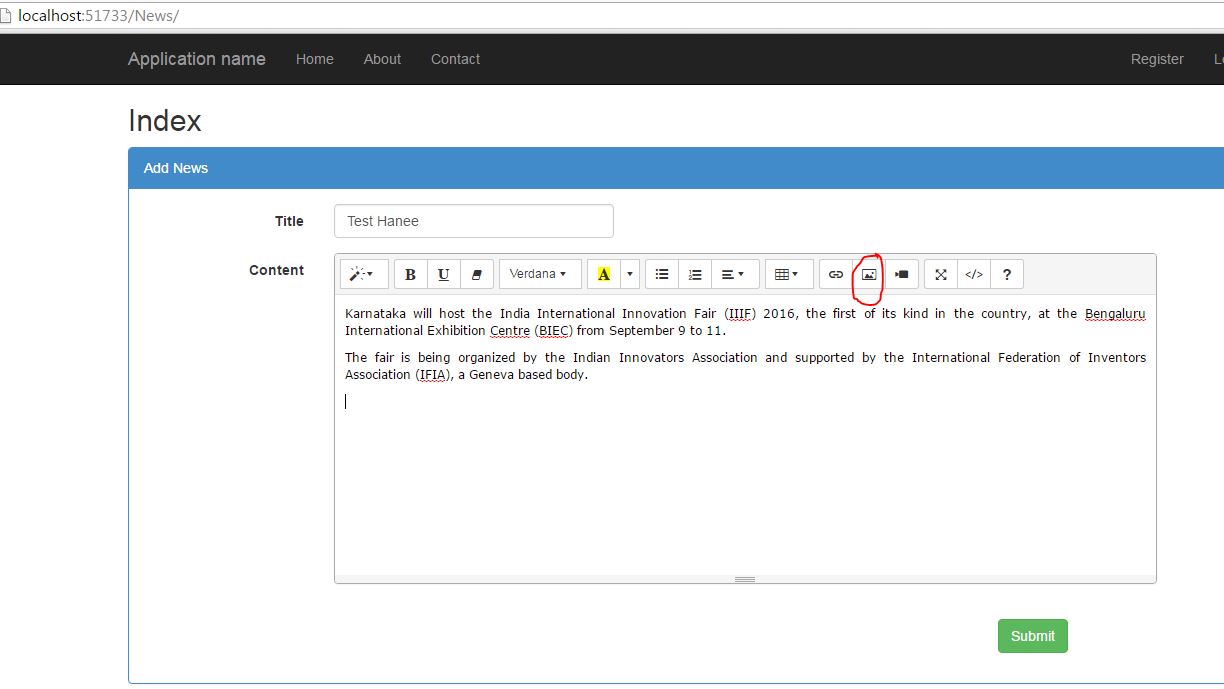
Click on the image upload icon
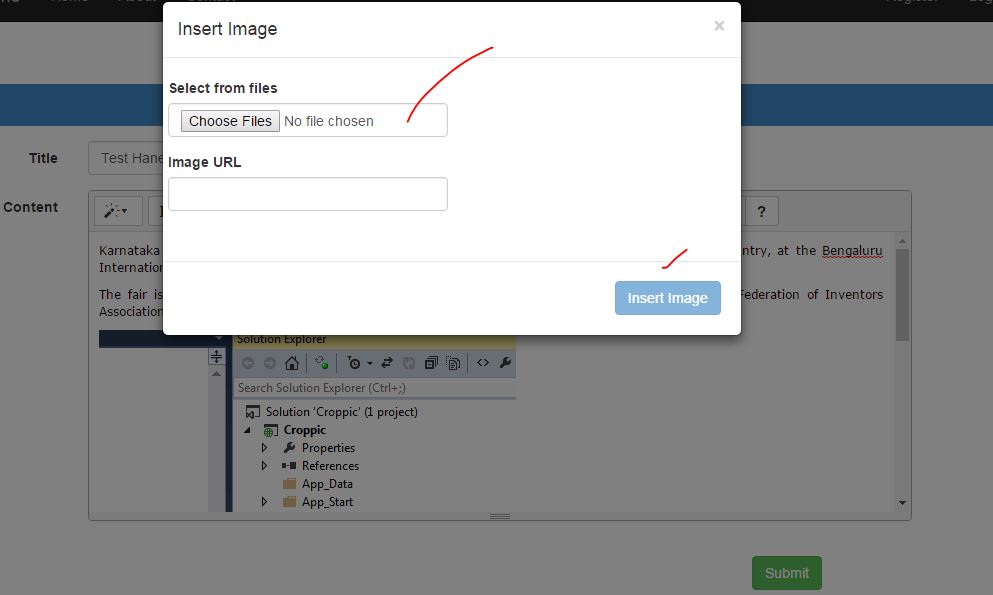
Browse for the image or enter the link for image:
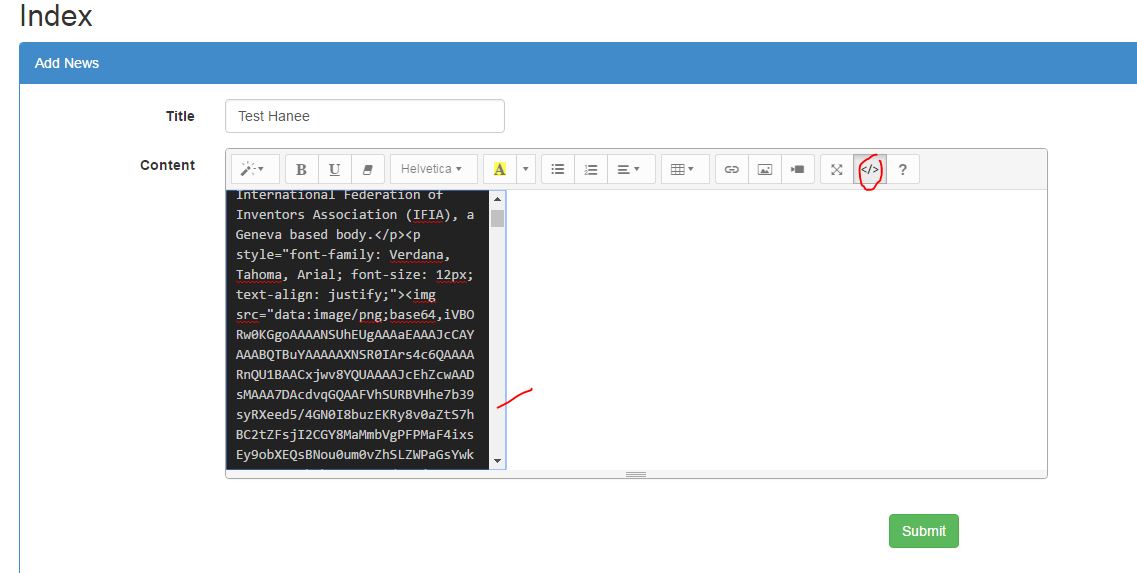
Once you insert the image the image will be converted into base64 data in the source.
Now Click on Submit .. AS i added a view with html.raw , the razor will display the submitted content

Please download the complete solution from my github : https://github.com/haneefputtur/WYSWYG/archive/master.zip
Note : Since the entire content inside the editor box including image is stored as text, make sure your db column have enough character length to avoid any issues.
For any clarifications please leave your comments.
Update :: For an advanced version with similar feature refer to this article :: http://haneefputtur.com/step-step-instruction-integrate-tinymce-uploadify-using-asp-net-mvc-c.html