Requirement :
Developing a solar powered weather station which will monitor Temperature. Pressure, Humidity and Altitude from Sea Level.
Parts Required
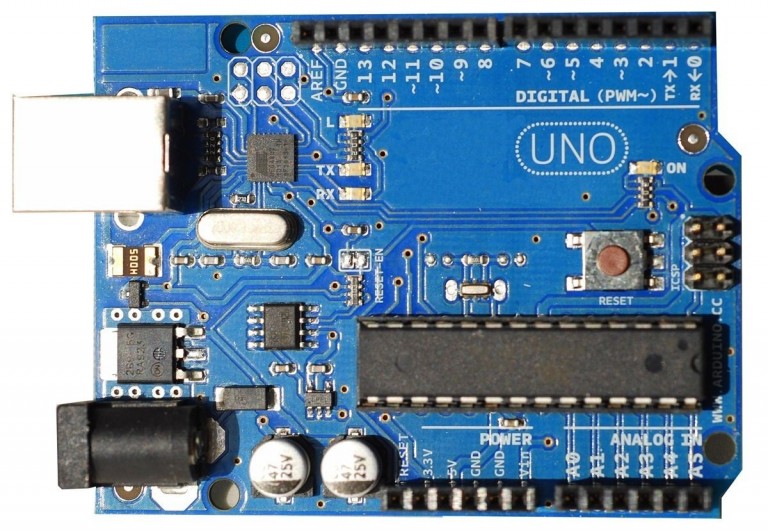
Arduino Uno
- LCD
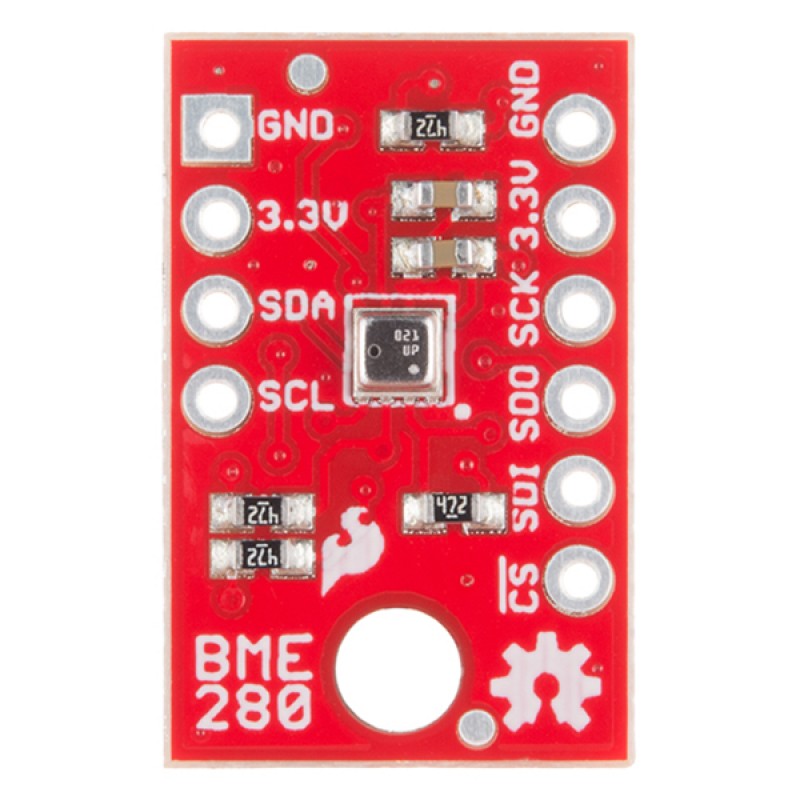
- BM280 (https://www.sparkfun.com/products/13676)
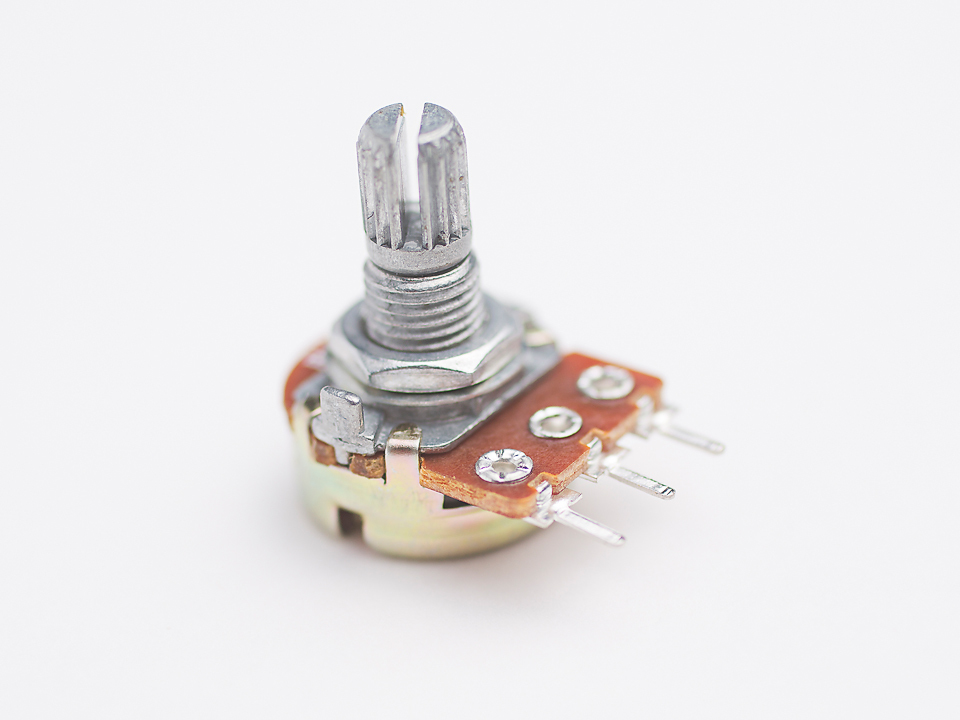
- 10k ohm potentiometer (optional)
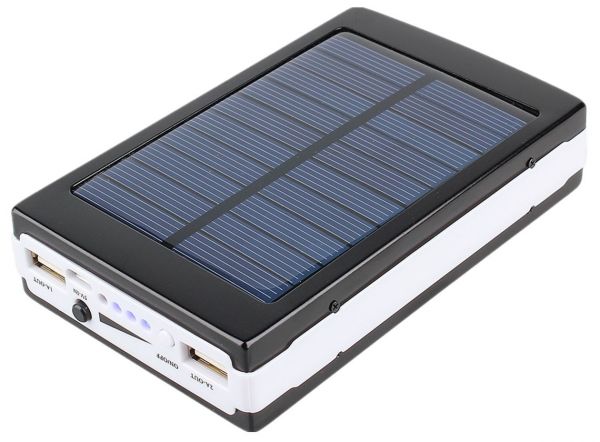
- Power Bank with Solar Panel
Parts images:
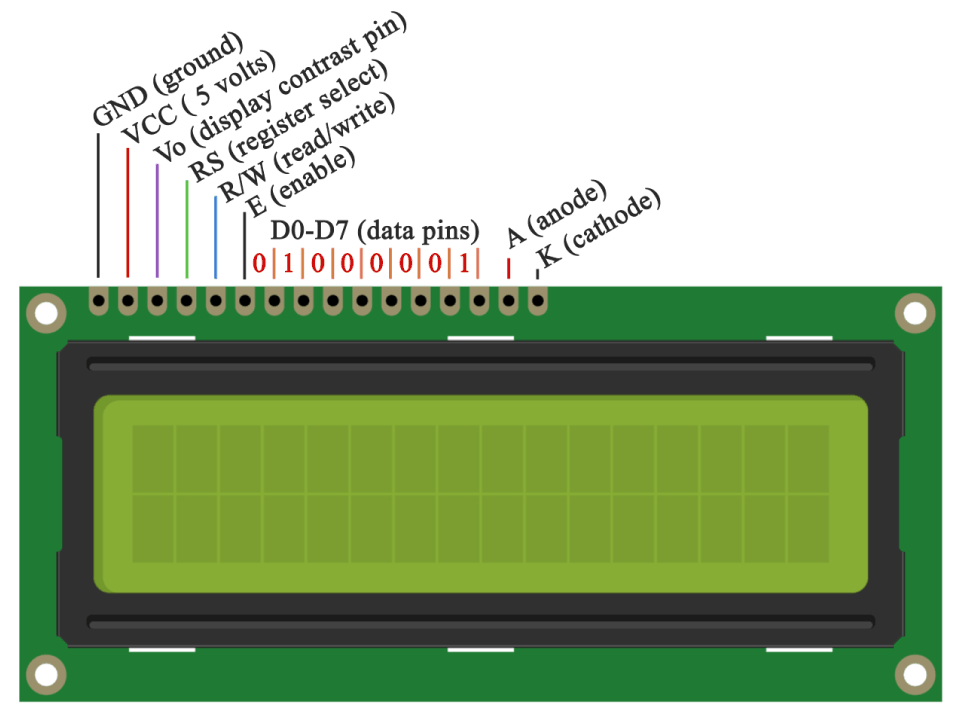
LCD
Potentiometer (To adjust brightness)
Arduino Uno
Powerbank with Solar Panel
Connection Details :
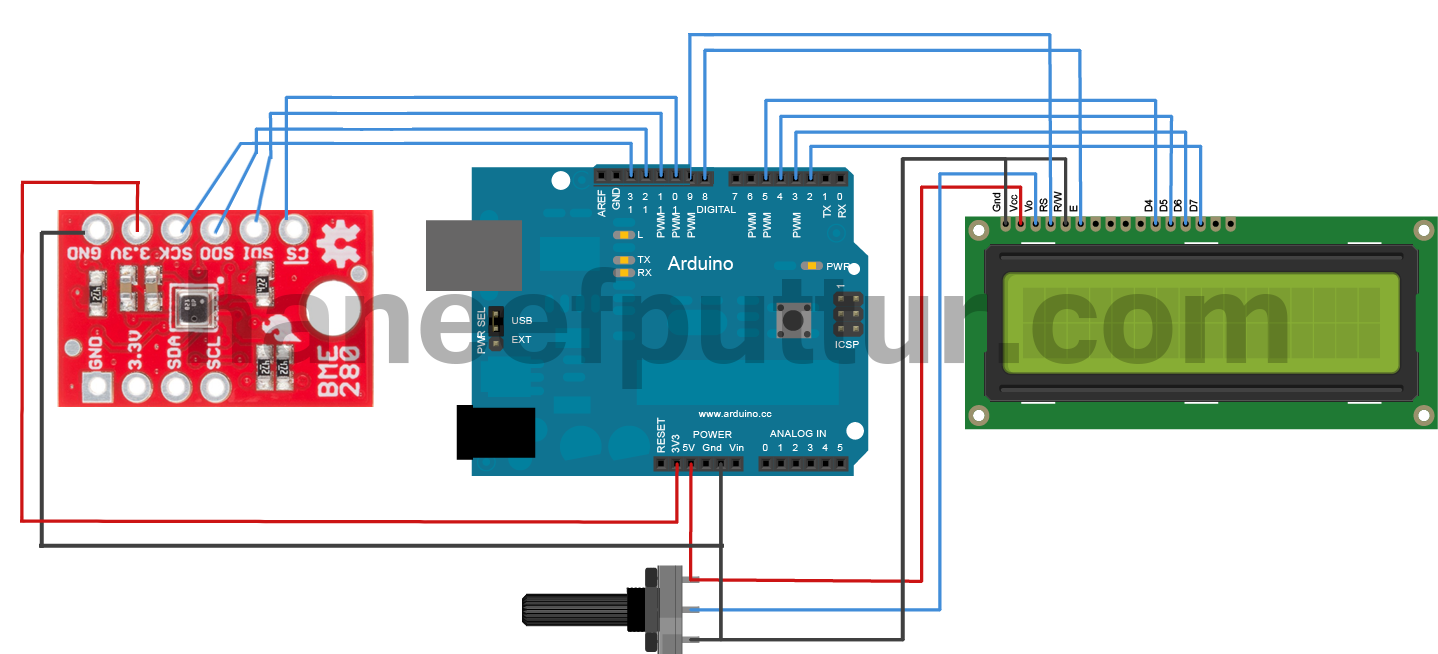
BME280 — Connection
- Connect 3.3V of BME 280 to 3.3V of Arduino.
- Connect GND of BME 280 to ground of Arduino.
- Connect the SCK pin of BME 280 to Digital #13 of Arduino.
- Connect the SDO pin of BME 280 to Digital #12 of Arduino.
- Connect the SDI pin of BME 280 to Digital #11 of Arduino.
- Connect the CS pin of BME 280 Digital #10 of Arduino.
LCD Connection
- LCD RS pin to digital pin 9
- LCD Enable pin to digital pin 8
- LCD D4 pin to digital pin 5
- LCD D5 pin to digital pin 4
- LCD D6 pin to digital pin 3
- LCD D7 pin to digital pin 2
- Connect potentiometer only if you need to adjust brightness. if not please connect the pin V0 to GND
Library Required:
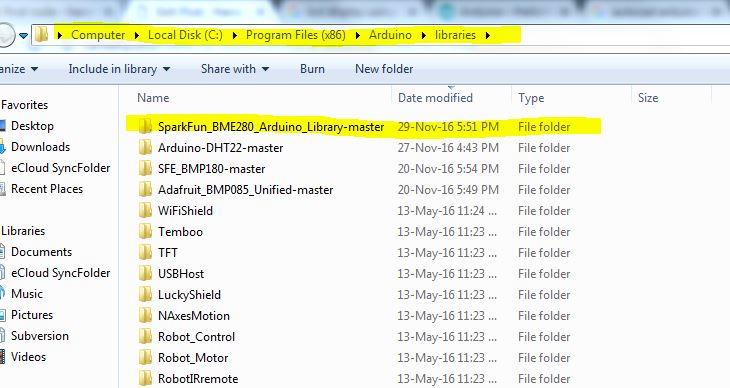
Download BME280 Library and copy to Adrduino library folder from this link : https://github.com/sparkfun/SparkFun_BME280_Arduino_Library
Download the zip file , extract to a folder SparkFun_BME280_Arduino_Library , then copy the folder to C:\Program Files (x86)\Arduino\libraries (If you are using Windows)
Code
#include <stdint.h>
#include "SparkFunBME280.h"
#include "Wire.h"
#include "SPI.h"
#include <LiquidCrystal.h>

//Connect Vin to 3.3V.
//Connect GND to ground
//Connect the SCK pin to Digital #13
//Connect the SDO pin to Digital #12
//Connect the SDI pin to Digital #11
//Connect the CS pin Digital #10

/*
  The circuit:
 * LCD RS pin to digital pin 9
 * LCD Enable pin to digital pin 8
 * LCD D4 pin to digital pin 5
 * LCD D5 pin to digital pin 4
 * LCD D6 pin to digital pin 3
 * LCD D7 pin to digital pin 2
 * LCD R/W pin to ground
 * LCD VSS pin to ground
 * LCD VCC pin to 5V
 * 10K Potentiometer: First pin to +5V, Middle Pin to Vo, Third Pin to GND
coding by haneefputtur.com
*/
//Global sensor object


BME280 mySensor;
LiquidCrystal lcd(9, 8, 5, 4, 3, 2);

void setup()
{
 Serial.begin(9600);
 //SPI
 mySensor.settings.commInterface = SPI_MODE;
 mySensor.settings.chipSelectPin = 10;

 //Operation settings
 mySensor.settings.runMode = 3; //Normal mode
 mySensor.settings.tStandby = 0;
 mySensor.settings.filter = 0;
 mySensor.settings.tempOverSample = 1;
 mySensor.settings.pressOverSample = 1;
 mySensor.settings.humidOverSample = 1;

 //Start LCD
 lcd.begin(16, 2);
 // Print a logo message to the LCD.
 lcd.print("Haneef Puttur");
 lcd.setCursor(0, 1);
 lcd.print("haneefputtur.com");
 delay (2500);
 lcd.clear();

 // Print another message to the LCD.
 lcd.setCursor(0, 0);
 lcd.print("Weather");
 lcd.setCursor(0, 1);
 lcd.print("Project");
 delay (2500);


 lcd.clear();
 lcd.setCursor(1, 0);
 lcd.print("Starting");
 lcd.setCursor(1, 1);
 lcd.print("BME280");

// Serial.print("Starting BME280... result of .begin(): 0x");
 delay(10); //BME280 requires 2ms to start up.
 Serial.println(mySensor.begin(), HEX);

}

void loop()
{
 //Each loop, take a reading.

 delay(5000);
 lcd.clear();
 lcd.setCursor(1, 0);
 lcd.print("Temperature:");
 lcd.setCursor(1, 1);
 lcd.print(mySensor.readTempF(), 2);
 lcd.print(" degrees F");

 //pressure
 delay(5000);
 lcd.clear();
 lcd.setCursor(1, 0);
 lcd.print("Pressure: ");

 lcd.setCursor(1, 1);
 lcd.print(mySensor.readFloatPressure(), 2);
 lcd.print(" Pa");


 delay(5000);
 lcd.clear();
 lcd.setCursor(1, 0);
 lcd.print("Altitude: ");
 lcd.setCursor(1, 1);
 lcd.print(mySensor.readFloatAltitudeMeters(), 2);
 lcd.println(" Mtrs");


// Serial.print("Altitude: ");
// Serial.print(mySensor.readFloatAltitudeFeet(), 2);
// Serial.println("ft");

 delay(5000);
 lcd.clear();
 lcd.setCursor(1, 0);
 lcd.print("%RH:");
 lcd.setCursor(1, 1);
 lcd.print(mySensor.readFloatHumidity(), 2);
 lcd.println(" %");


 // Serial.println();

 delay(1000);

}
After testing Pack the unit so that Arduino board is inside the box, Sensor BME 280 is outside the box suitable packed. Connect the USB cable of Arduino to Solar Power Bank.