Scenario :
We have a simple python code which can be executed using a physical machine by developer or coder. However if you want extend this code a web based service where others can utilize the code using a web site.
Proof of concept :
Converting a simple python script which basically display a name and read text from a txt file.
Complete Source Code:
Download Source Code : https://github.com/haneefputtur/pythonweb
Steps Involved:
- Take the code
- Separate the variables.
- Install flask
- Run the service
- Create html file which can collect the variables required.
- Create the route in app file to display html file
- Create the route in app file to collect the submitted data.
- Upload the content to a folder.
- Read the content of the text file uploaded.
Assumption:
- Python installed with Anaconda command Prompt.
- one text file named haneef.txt with some text for testing purpose.
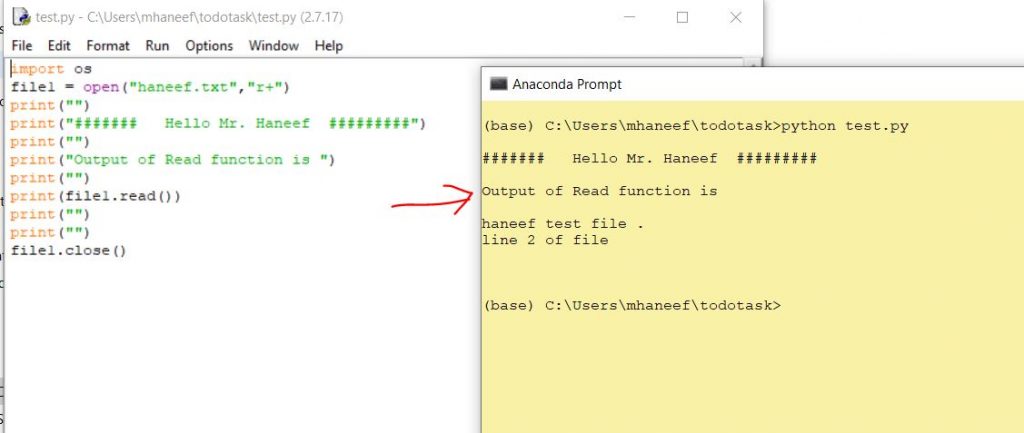
Step 1: Basic Code
import os

file1 = open("haneef.txt","r+")

print("")

print("#######   Hello Mr. Haneef  #########")

print("")

print("Output of Read function is ")

print("")

print(file1.read())

print("")

print("")

file1.close()

Step 2 : Separate Variables.
import os
#Define Variables
filename=”haneef.txt”
person=”Mr. Haneef”
# Do not edit below this line
out1=”####### Hello “”+person+ #########”
file1 = open(filename,”r+”)
out2=file1.read()
file1.close()
##### output is below this line
print(“”)
print(out1)
print(“”)
print(“Output of Read function is “)
print(“”)
print(out2)
print(“”)
print(“”)
##Note that all output is available at out1 and out2
Step 3 : Install Flask
Flask is a lightweight WSGI web application framework. It is designed to make getting started quick and easy, with the ability to scale up to complex applications. It began as a simple wrapper around Werkzeug and Jinja and has become one of the most popular Python web application frameworks.
Read More about Flask : https://palletsprojects.com/p/flask/
conda install -c anaconda flask
Step 4. Test flask install
conda install -c anaconda flask
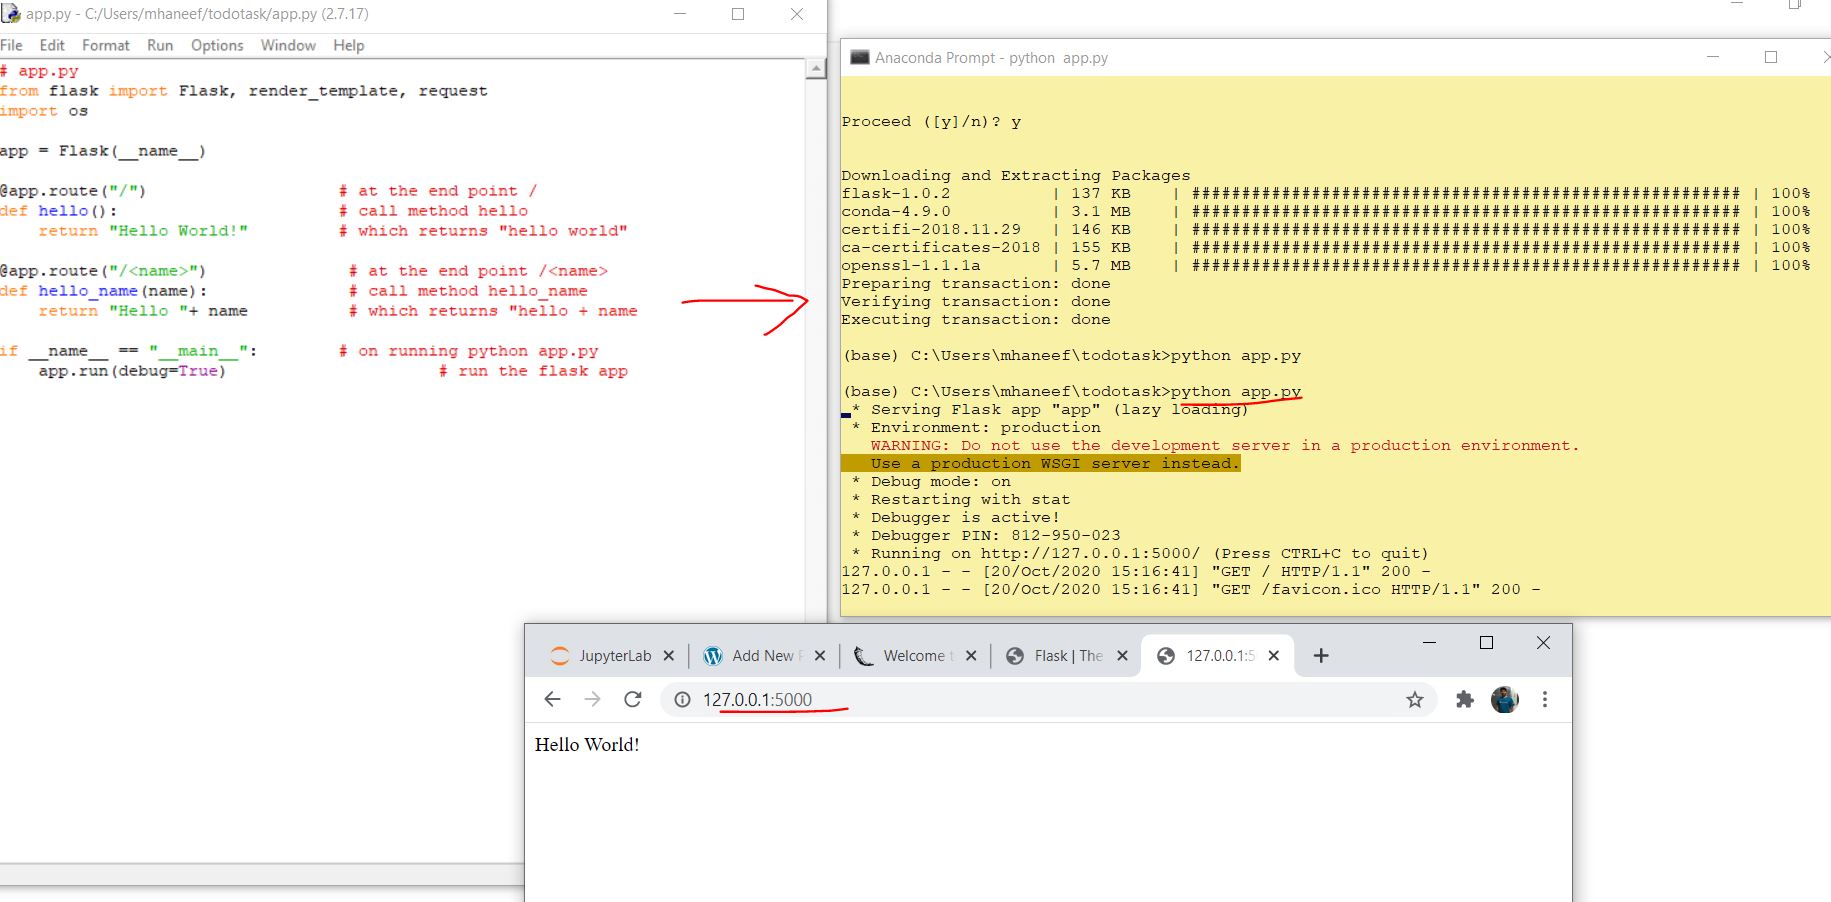
# app.py

from flask import Flask, render_template, request

import os
app = Flask(__name__)
@app.route(“/”) # at the end point /
def hello(): # call method hello
return “Hello World!” # which returns “hello world”
@app.route(“/”) # at the end point /
def hello_name(name): # call method hello_name
return “Hello “+ name # which returns “hello + name
if __name__ == “__main__”: # on running python app.py
app.run(debug=True) # run the flask app
Now save the above code as app.py
Now run the server :
python app.py
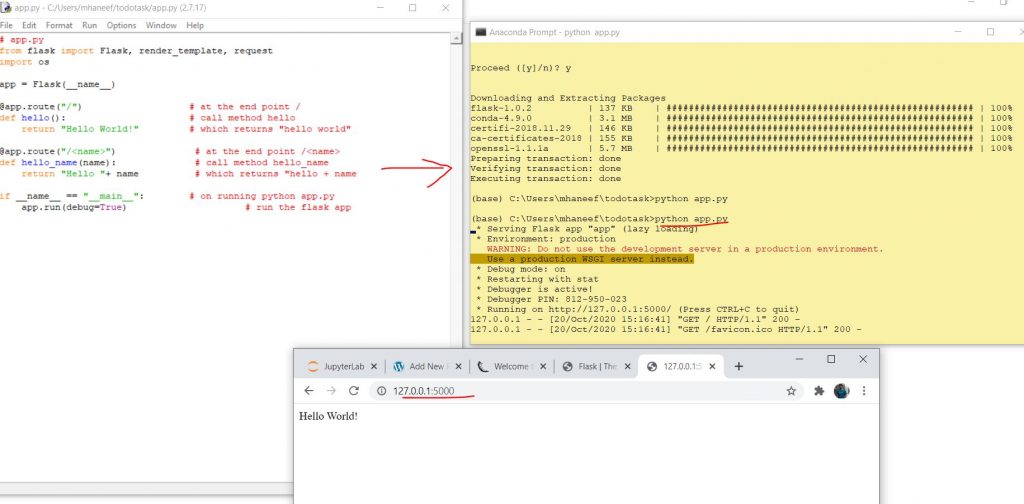
If you can see Hello World means Flask installation is successful.
Step 5 :
Identify the variables required from a user and create an html file to collect.
<html>
<body>
<h2>Sample Python Interface – Haneef Test</h2><br><br>
<form action = “http://localhost:5000/uploader” method = “POST”
enctype = “multipart/form-data”>
<br> Name of Uploader : <br>
<input type = “text” name = “person” />
<br><br><br>Select File : <br>
<input type = “file” name = “file” />
<input type = “submit”/>
</form>
</body>
</html>
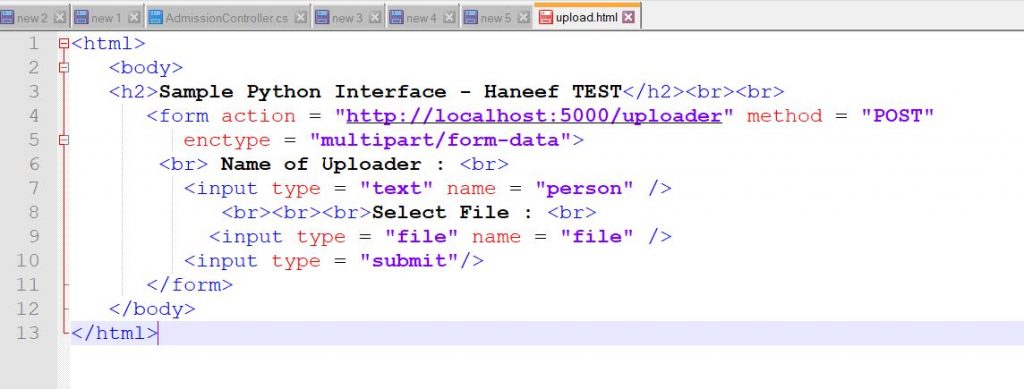
Save above files as upload.html and save inside a folder called templates
Note
- person is a variable textbox input
- file is a second variable which will allow to upload the file.
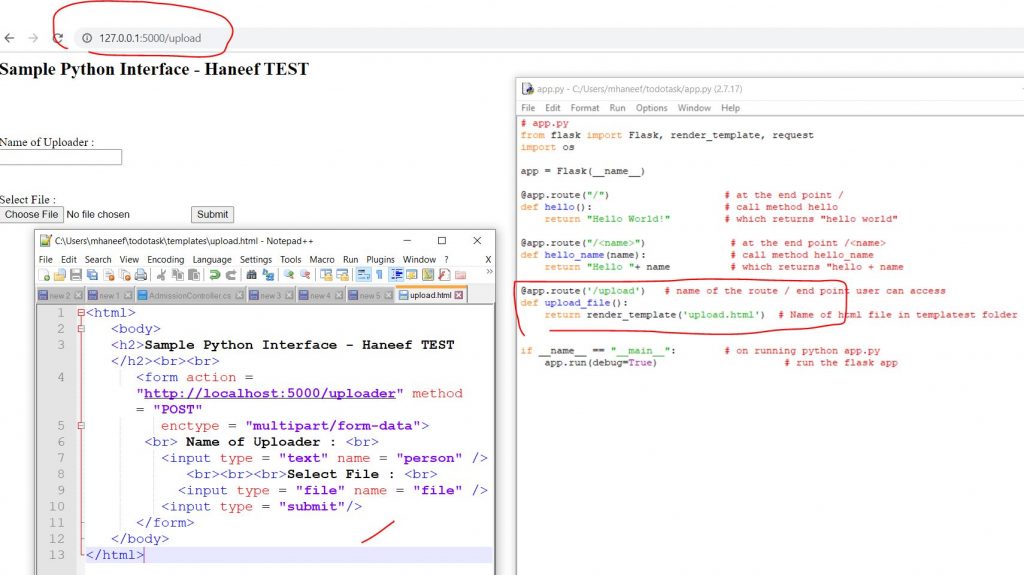
Step 6 :
@app.route(‘/upload’) # name of the route / end point user can access
def upload_file():
return render_template(‘upload.html’) # Name of html file in templates folder
Add above codes to app.py as route and test the html.
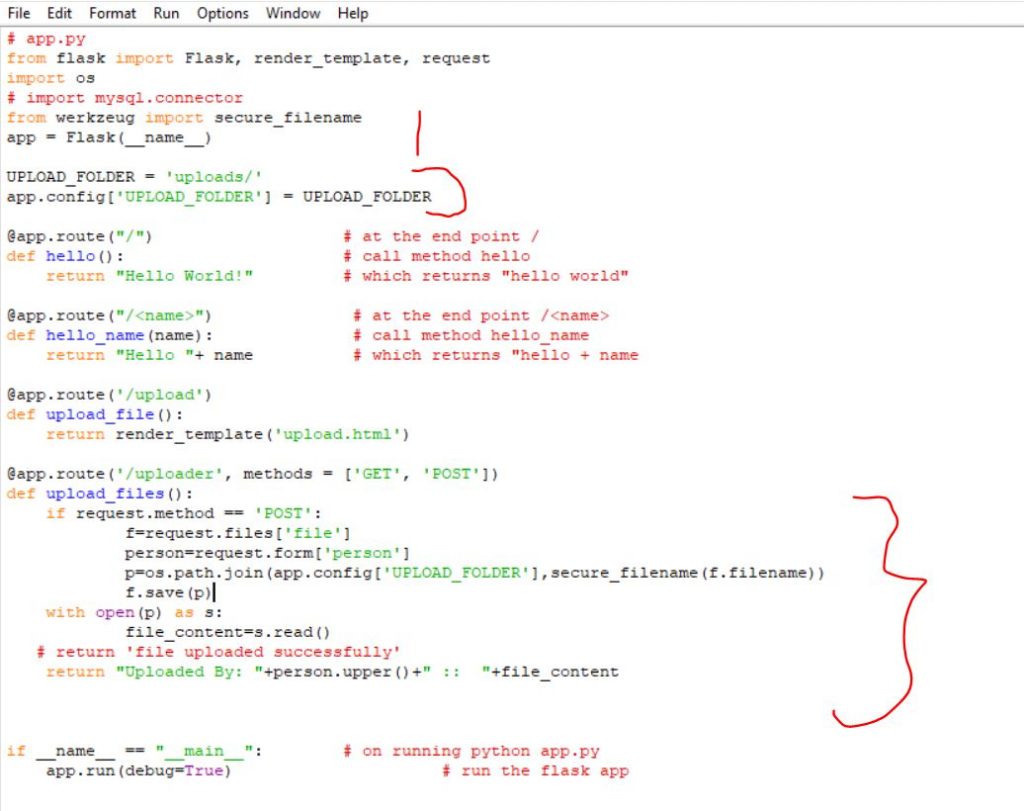
Step 7 : Add route to collect submitted data
@app.route('/uploader', methods = ['GET', 'POST'])

def upload_files():

if request.method == 'POST':

f=request.files['file']

person=request.form['person']

p=os.path.join(app.config['UPLOAD_FOLDER'],secure_filename(f.filename))

f.save(p)

with open(p) as s:

file_content=s.read()

# return 'file uploaded successfully'

return "Uploaded By: "+person.upper()+" ::  "+file_content
Note : please add a variable called UPLOAD_Folder to define the upload path.
UPLOAD_FOLDER = ‘uploads/’
app.config[‘UPLOAD_FOLDER’] = UPLOAD_FOLDER
Also create a folder for storing uploaded files.
Save the file and open the route
Step 8 : Upload content and file through form created
http://127.0.0.1:5000/upload
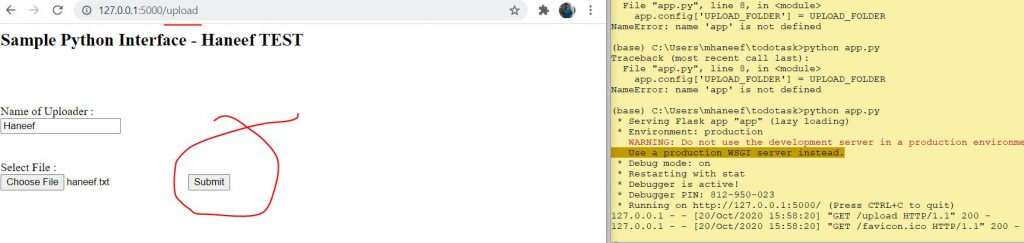
Step 9 : Display the output
After submit you will receive the output as follows.
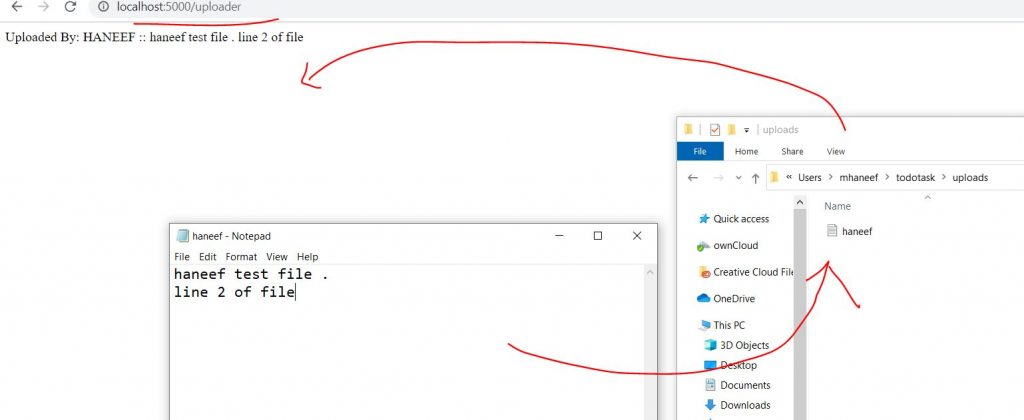
This is a proof of concept and can be extended to convert any python code as web service.
Download Complete Source Code : https://github.com/haneefputtur/pythonweb